
Teaching Lamp Repair Kit
Boulder U-Fix-It Clinic
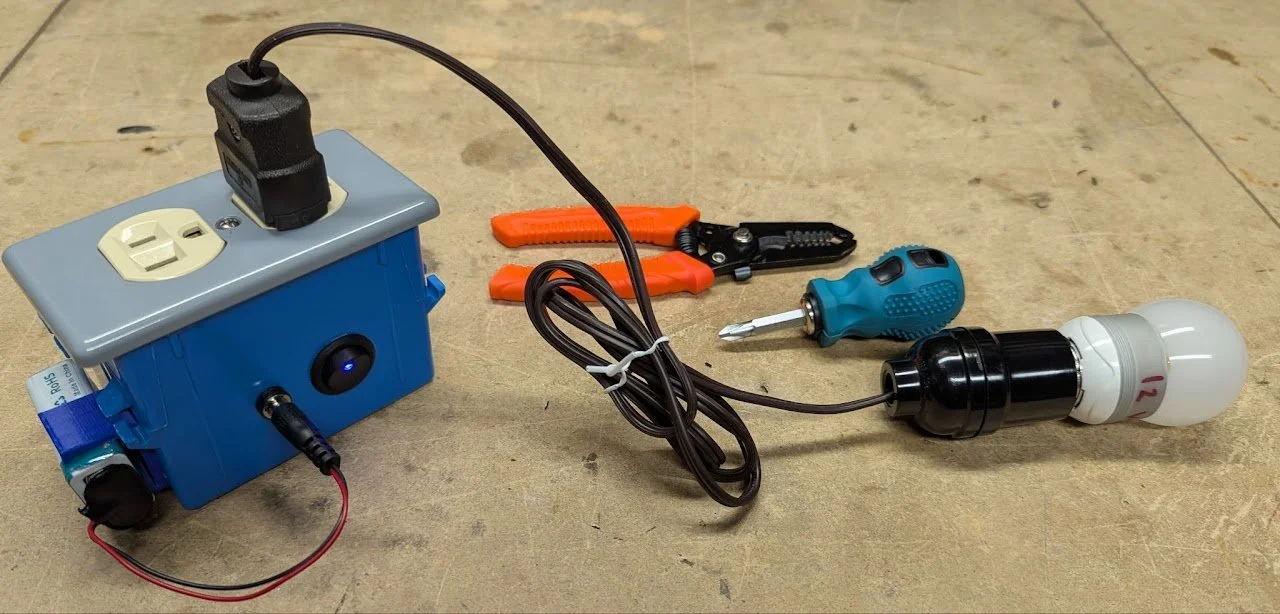
The assembled kit. Photo credit: U-Fix-It Clinic
Use this kit to convey the fundamentals of electricity by way of teaching lamp repair. The skills and knowledge are transferable to repairing other simple electrical objects.
This kit is excellent for any venue, but is especially valuable in a classroom.
The hands-on activity is:
Relatable: lamps are everyday objects students recognize,
Science-Aligned: teaches the concept of a complete electrical circuit,
Simple and safe: uses low (9V) voltage,
Confidence boosting: guarantees a successful fix,
Standardized project: allows for higher student to adult/teacher ratio than varied objects, and
Affordable: free guide and low-cost reusable parts.
The Lesson:
Repair — Whatever aspect of repair the educator wants to emphasize: the role of repair in caring for the environment; students’ capacity to choose how they want to respond to their broken objects; repair and the economy — consumption, manufacturing, resource extraction, waste management; right to repair; etc.
Science — physics - electricity; chemistry - characteristics of various materials; ecology - environmental systems; etc.
Required — Students are taught the basics of electricity, including complete circuits.
Safety — Students must be instructed that these kits are low voltage so there is no risk of electrocution, their lamps at home are NOT low-voltage, and there is a risk of electrocution in working with standard electrical objects.
Teaching Resources — Consider using slide decks from:
The Skills:
Problem-solving, creative thinking, design, cognitive, fine motor, and more.
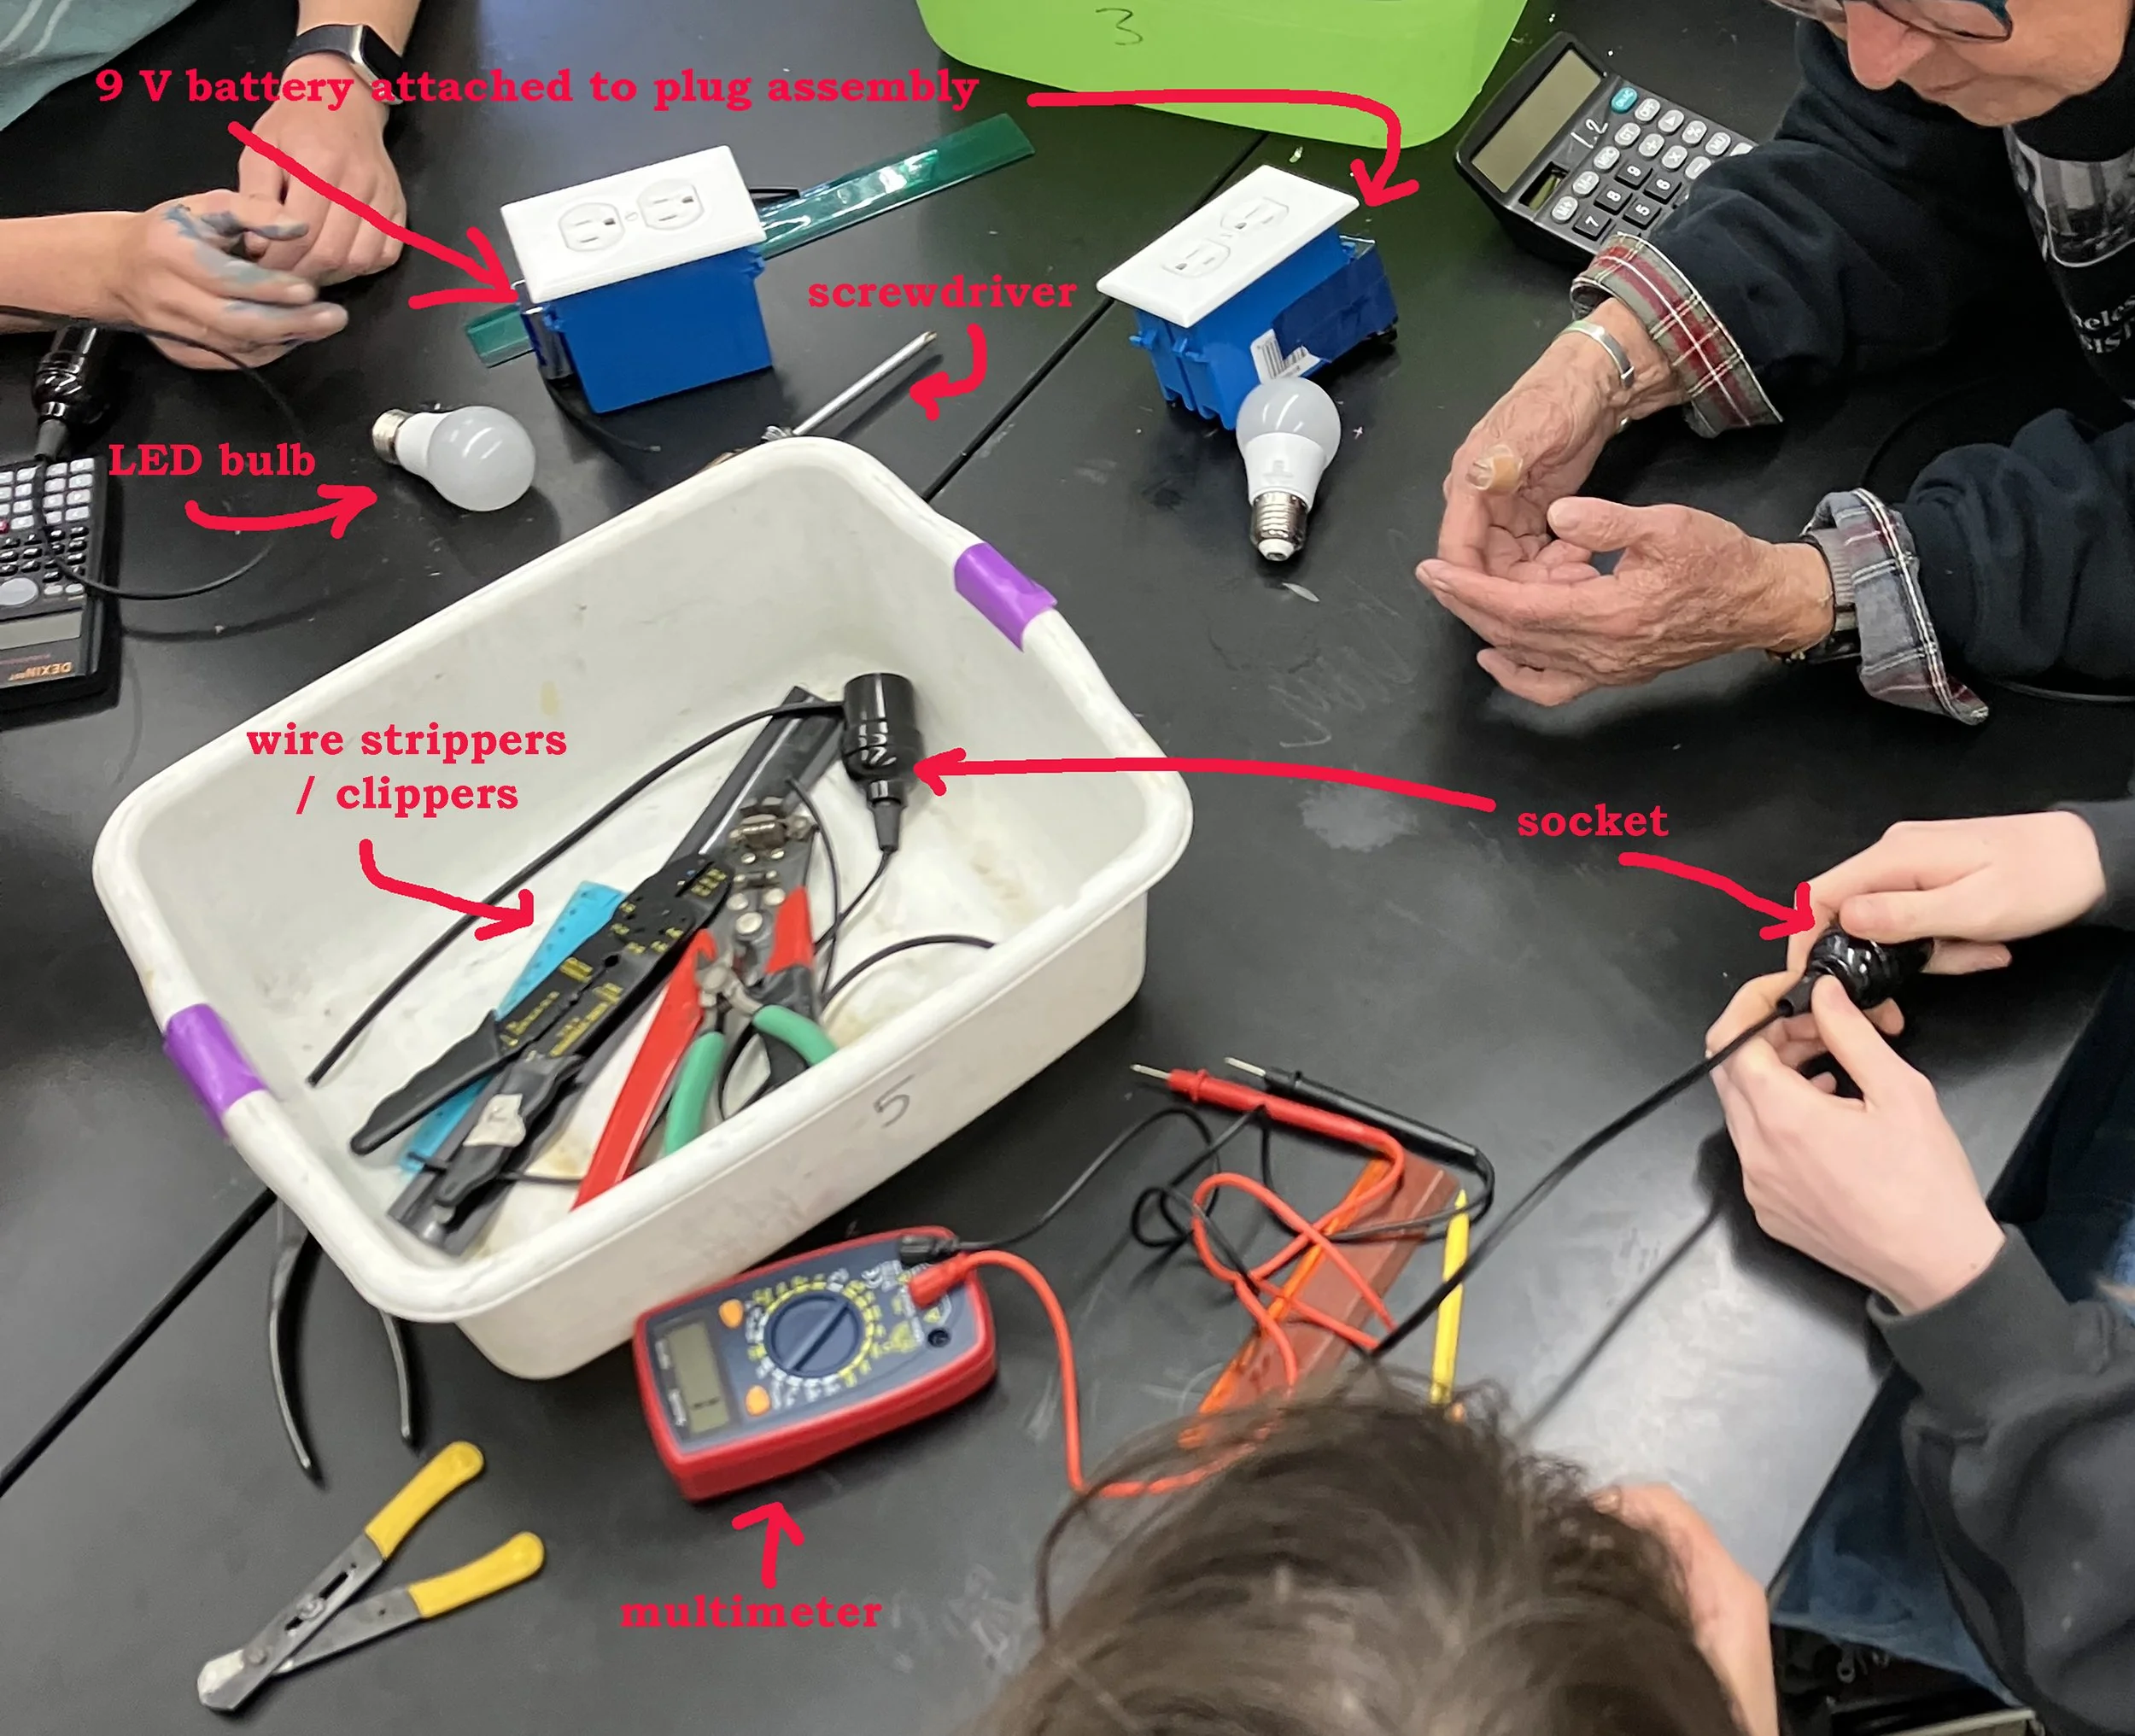
Berkeley High School students at work in a class taught by Kimberley Schroder of Nimble Repair. Photo credit: Vita Wells
The Activity:
Once assembled, each kit contains:
Basic components of a lamp — plug, cord, socket, bulb and power source.
Tools to repair — screwdriver, multimeter, wire stripper (and wire cutter if not integral to the wire stripper).
Note: the kit includes an intentional break in the circuit (inside the plug or socket) for students to find and fix.
The Steps — Students:
Plug in the assembly, confirming it does not work.
Unplug the assembly.
Investigate components to locate the break in the circuit.
Use the wire cutter, wire stripper and screwdriver to repair the circuit.
Use a multimeter to confirm they have a complete circuit.
Plug in the assembly, light the bulb and celebrate a successful fix.
“Break” the assembly for the next person using the kit — snip the cord inside either the socket or the plug.
More advanced: The “break” can be a burnt out bulb. Use the multimeter to determine whether the broken circuit is in the bulb.
Additional resources for teaching about complete circuits and repairing electrical objects:
Speedway Motors’ All About Electronic Circuits for Kids.
Consider using an Energy Stick for an engaging and fun way to expand students’ understanding of complete circuits.
Boulder U-Fix-It Clinic offers a comprehensive Lamp Repair Guide, as well as links to other repair resources.
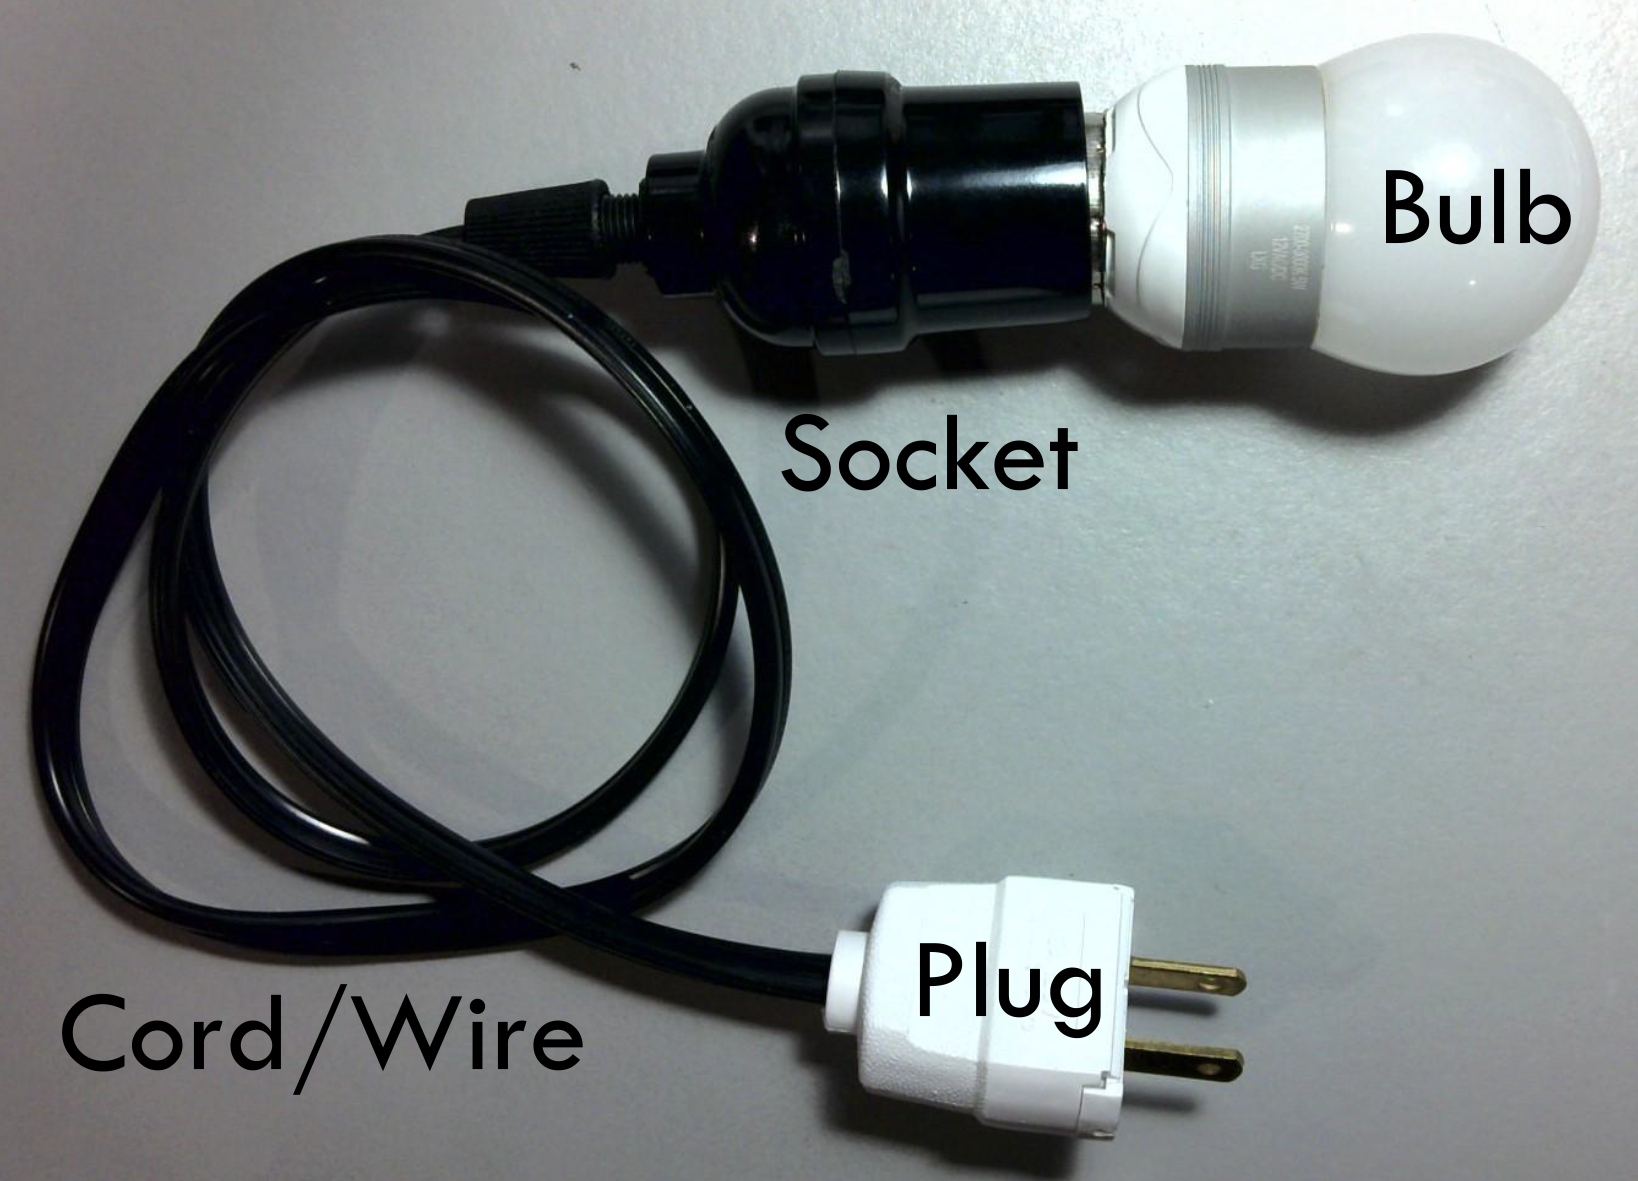
Photo credit: U-Fix-It Clinic
Assembling The Kits:
Educators or volunteers assemble the kits from the information in the Boulder U-Fix-It Clinic Lamp Repair resource.
Note: Nimble Repair is available to consult on assembly and/or teaching the workshop. (Information below.)
Users procure parts and assemble kits.
Each kit is intentionally “broken” — a wire is detached inside either the plug or the socket. The broken circuit is invisible from the outside.
More advanced: the “break” may be a burnt out bulb.
The Boulder U-Fix-It Clinic Teaching Lamp Repair Guide:
Provides a detailed list of required PARTS, with links to online sources.
Provides a list of required TOOLS. (Add a wire cutter if it’s not integrated into the wire stripper.)
Shows an image of the assembled kit.
Does not provide assembly instructions, but assembly can be construed from images, including those in the Slide Deck. Assembly is straightforward, requiring no more skills and knowledge than are taught to students.
Offers a SLIDE DECK with information and images to support assembling the kit. (The slide deck also supports teaching with the kit, repair generally, and the Boulder U-Fix-It Clinic initiative more specifically.)
Wayne Seltzer created the Teaching Lamp Repair Kit guidelines and the Teaching Slide Deck. Wayne leads Boulder U-Fix-It Clinic, which has promoted repair by hosting community repair events since 2013. Teaching workshops on how to repair basic objects, advocating for Colorado right to repair legislation, publishing articles, and more.
Kimberley Schroder, founder of Nimble Repair, created the Electronics Repair Slide Deck and uses the Energy Stick when teaching about complete circuits. Nimble Repair is available for consultation on assembling the kits, and/or teaching the workshop. Further, Nimble is seeking to bring workshops like this and other forms of teaching basic repair skills (jewelry, clothing) to more settings, from schools and community events to corporate team building experiences. Contact: hello@nimble.repair.